Before starting, consider the distances between Deep Sentinel Cameras and the Hub
The maximum range of the Camera from the Hub will vary between different installations. Each installation is unique. The range will be reduced by each wall, ceiling or other obstructions between the Camera and the Hub . Also, note that Deep Sentinel Cameras are designed for outside use so range gets further reduced as typically the Hub is positioned inside the home & Cameras are positioned outside of the home. The range is also affected by the positioning and elevation height of the hub. (See Deep Sentinel Hub Positioning)
The materials or items listed below can significantly reduce Wi-Fi signal strength & cause interference the most so should be considered and avoided where possible:
- Unusually thick walls or ceiling
- Brick, Concrete or Stone
- Glass (including mirrors)
- Ceramic (e.g. tiled surfaces in a kitchen or bathroom)
- Large electrical appliances (e.g. refrigerators, TV’s or similar)
- Metal object (e.g. shelving, tables, desks or similar)
- Large bodies of water (e.g. fish tank, water heater or similar)
Position each Camera at least 10 feet (3 meters) from the Hub and allow at least 6.5 feet (2 meters) between Cameras.
Following these guidelines will help reduce the risk of Wi-Fi signal interference & optimizing signal strength.

1. Deep Sentinel Camera Positioning
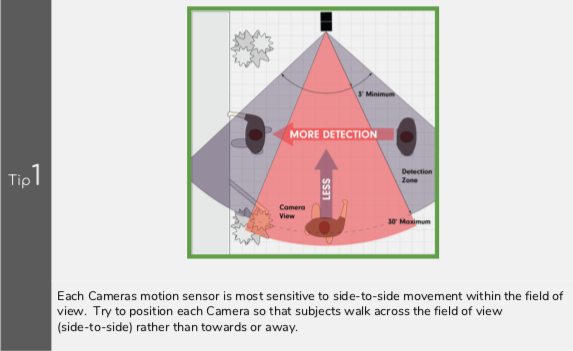
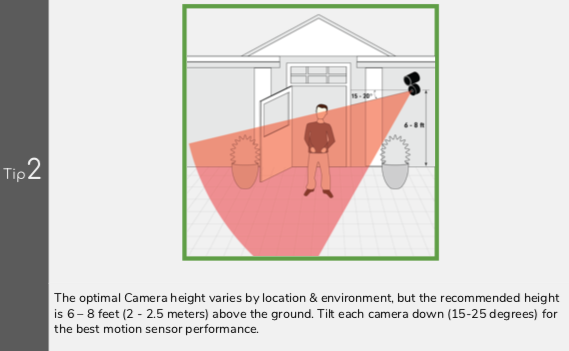
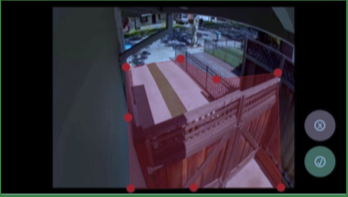
Follow these best practices to help ensure a successful installation. Use Live View in the Deep Sentinel App to verify and adjust the field of view for each Cameras installation. When choosing a camera location, please note that cameras will wake up when the activity is within a range of 3 to 30 feet away from the camera. And the motion sensor is most sensitive to side-to-side movement within the field of view (see tip below).
2. Establishing & Editing Protection Zones
Here are some guidelines to follow related to Protection Zones
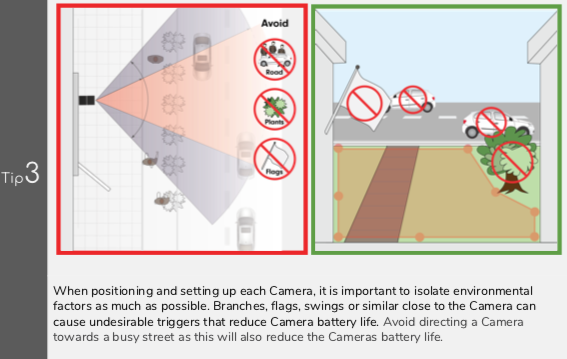
- First, go into the edit protection zone for the Camera in the system settings. Assess the field of view for the Camera and optimize the red Protection Zone to include only the specific areas where coverage is needed
- Edit the Protection Zone so it does not include busy public areas (e.g. a street, sidewalk, or busy driveway)
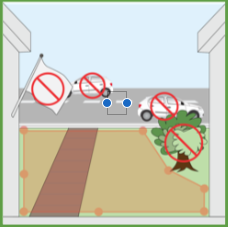
- Reducing the size of the Protection Zone will decrease false alerts.
- Review the Protection Zone positioning on a regular basis especially after replacing batteries or adjusting the camera angle or position.