NOTE: The below details how to install the older bullhorn on older deep sentinel cameras. For an updated guide for the NEW bullhorn as well as UNV cameras, see: Installing Bullhorns for Uniview Cameras
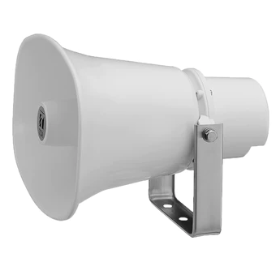
Our Deep Sentinel bullhorn speaker, pictured above.
Specifications:Integrated 20W power amplifier. Utilizes latest Class D technology Switchable Gain: 8dB, 16dB, 24dB & 32dB. Internal volume control to allow on-site tuning. Weatherproof to IP65 rating
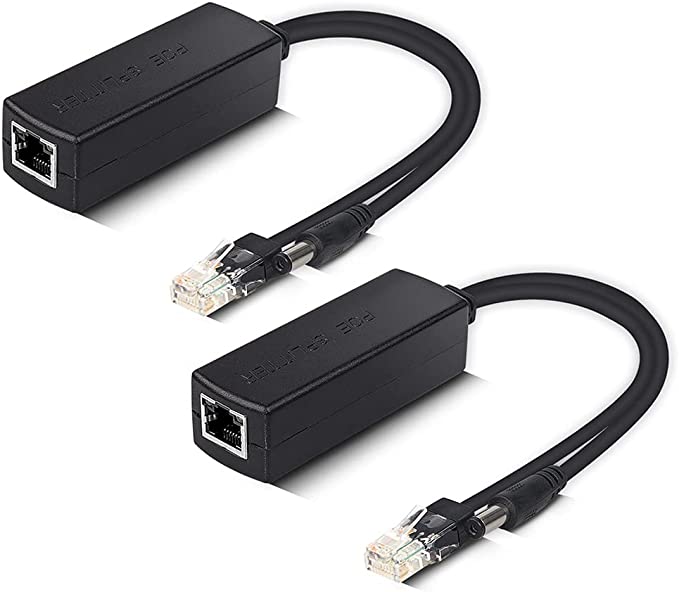
You will need a PoE power splitter
A PoE power splitter splits ethernet PoE power into an ethernet PoE connection and a DC (Direct Current) power connection for an accessory such as a bullhorn. The bullhorn needs a 48V to 12V converter because the bullhorn works with 12V DC power. They are available online and from many different retailers. We do not sell them currently in our own inventory so you will need to purchase them separately. One splitter for each bullhorn ordered / needed.
Here are some links to examples: https://smile.amazon.com/Splitter-Adapter-Compliant-Surveillance-Wireless/dp/B077982XCS
https://smile.amazon.com/Splitter-Compliant-Surveillance-5-5x2-1mm-PS5712TG/dp/B08HS4NT13
Here is what they look like (pictured below); they look like these or are very similar. It will have a female ethernet jack on one end with a male ethernet and a male DC jack on the other end.
To install / hook up:
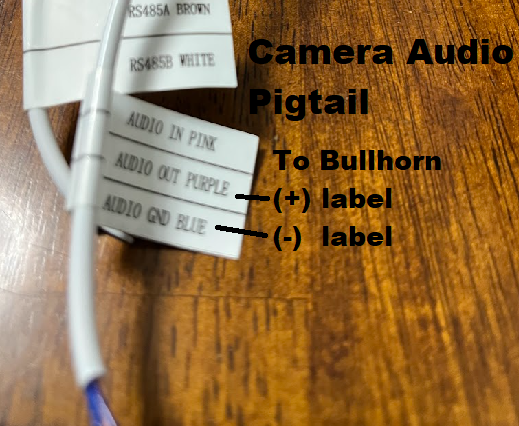
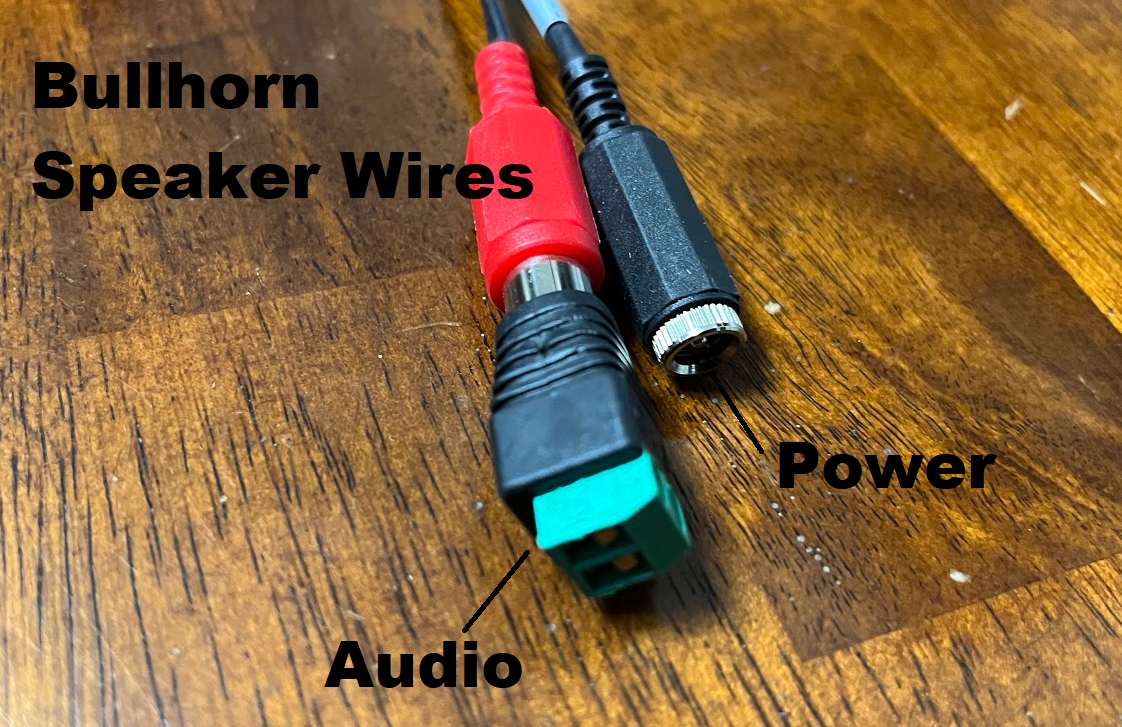
- First strip the white protective shell around the Audio cables from the camera pigtail back about 3 inches and then strip the purple (audio out) and blue (audio ground) cables back approximately 1/2"
- Next plug the audio cables per the labels in the picture below-- purple into the "+" label on the green adapter on the bullhorn, and blue into the "-" label on the green bullhorn audio adapter.
- Cut the male end of the DC jack on the POE splitter with a wirecutter and cut the adapters for the camera's "Optional Power" input and the bullhorn's Power input. Strip each of the exposed red & black wires back approximately 3/4" to 1".
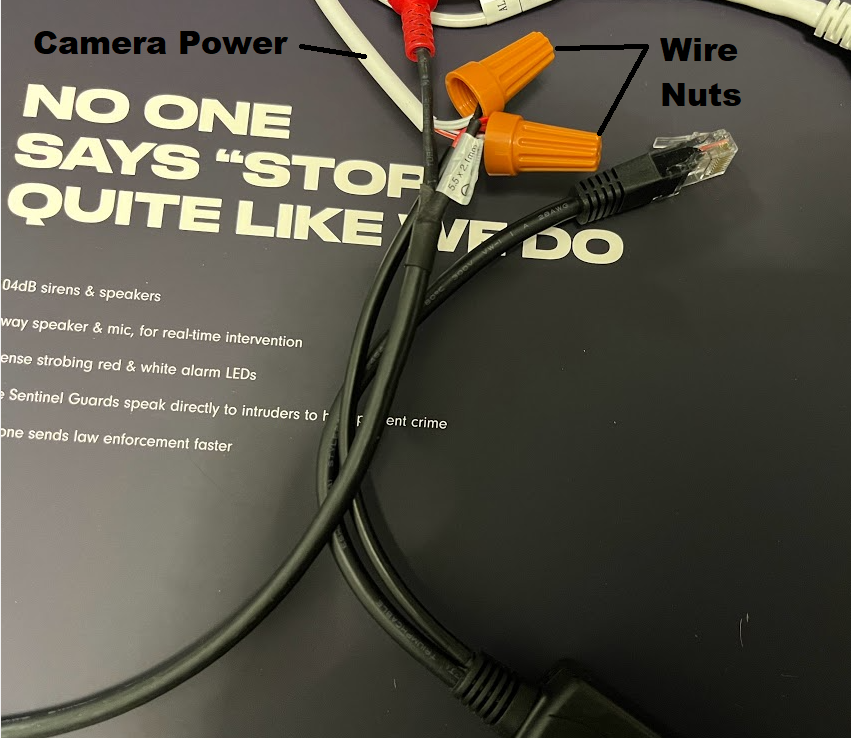
- Tie the 3 positive power wires together using a wirenut (yellow or orange for these low voltage wires): red output of the POE splitter, red wire from the bullhorn and the red from the camera's optional power.
- Tie the 3 ground wires together using another yellow/orange wirenut: black of the POE splitter to the black wire from the bullhorn and the black wire from the camera's optional power.
- Plug the outbound ethernet (cat) cable from the switch into the female end of the splitter.
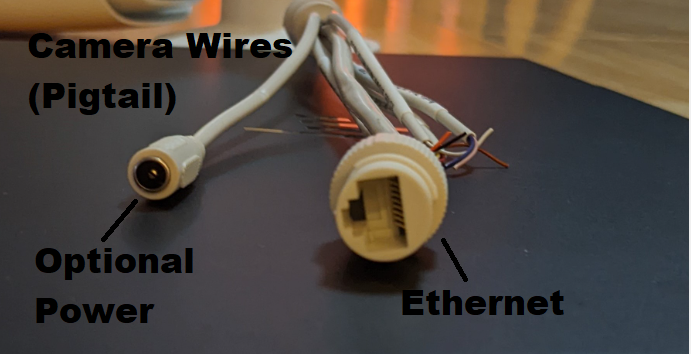
- Plug the male ethernet adapter from the splitter into the female end of the PoE camera's pigtail (the camera's pigtail is all of the wires at the end, ethernet, DC, and color coded wires).
- Test the bullhorn to make sure sound comes out before mounting. (it will be loud so point it away from yourself)
- As long as it tests fine, it is ready to mount!
PoE camera's pigtail:
Power cable attached using WireNut: Red from POE splitter to the 2 red power wires from Camera and 1 red wire from bullhorn; black from POE splitter to the 2 black power wires from Camera and 1 black wire from bullhorn:
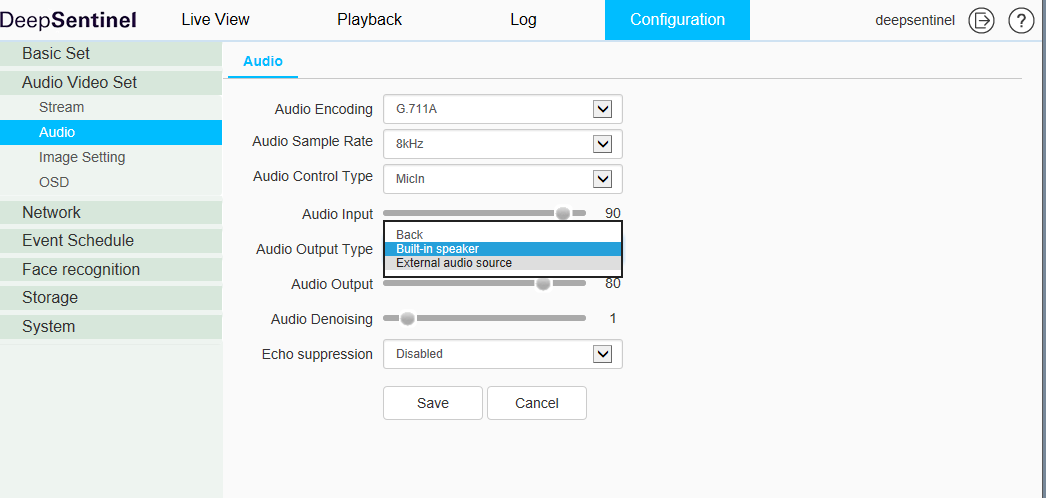
Next, you must also set the camera in the configuration interface to use the external audio device:
- Configuration
- Audio Video Set
- Audio Output: "External Audio Source"
- For more information about logging into the camera, see: PoE-Camera-Adjustments-V2-Jan-15-2021 (5).pdf
 Mounting Notes:
- When mounting, you may need to punch or drill an additional hole in the camera's J-Box to route the audio and power cables to the bullhorn.
- The bullhorn's cable is outdoor rated, so the bullhorn's cable can be routed directly into the J-Box, with the splitter and wiring inside of the box.
- Seal the hole in the J-Box with a low-voltage junction-box adapter.
- POE+ should provide sufficient power for this (should!) and does in our tests, but it also may not in certain circumstances
- If it doesn’t provide sufficient power the solution is to run a dedicated 12v power to the bullhorn, or (in the case of the SPECO loudspeaker) to reduce the amplifier gain. Upgrading to a switch with POE++ can also be a good alternative.
- If the wire nuts do not provide enough power, you can also use this recommended connector: WAGO Wire Connectors (see also: how to use)